Rocket League is a game of fine margins; a split second late to the ball, a degree off target when shooting, delaying in deciding to go for a ball or fall back? All add up to help or hinder your ability to win a match.
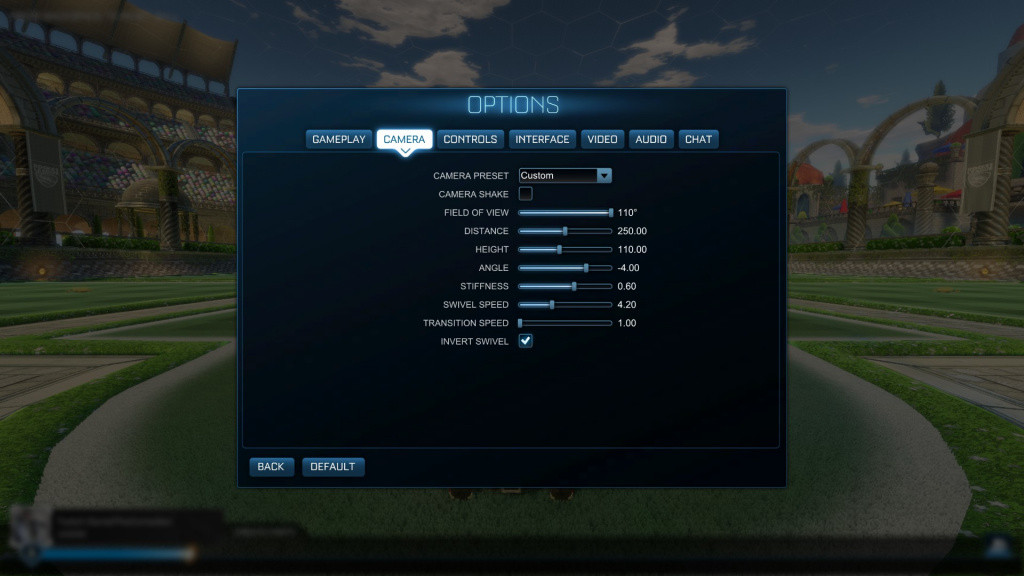
One way you can improve your performance and give yourself an advantage on the field is by adjusting your FOV and camera settings. Changing these settings will improve your awareness on the field, allowing you to see more of the action and react better to what is going on around you - which in a game of margins, can be the difference between winning and losing.
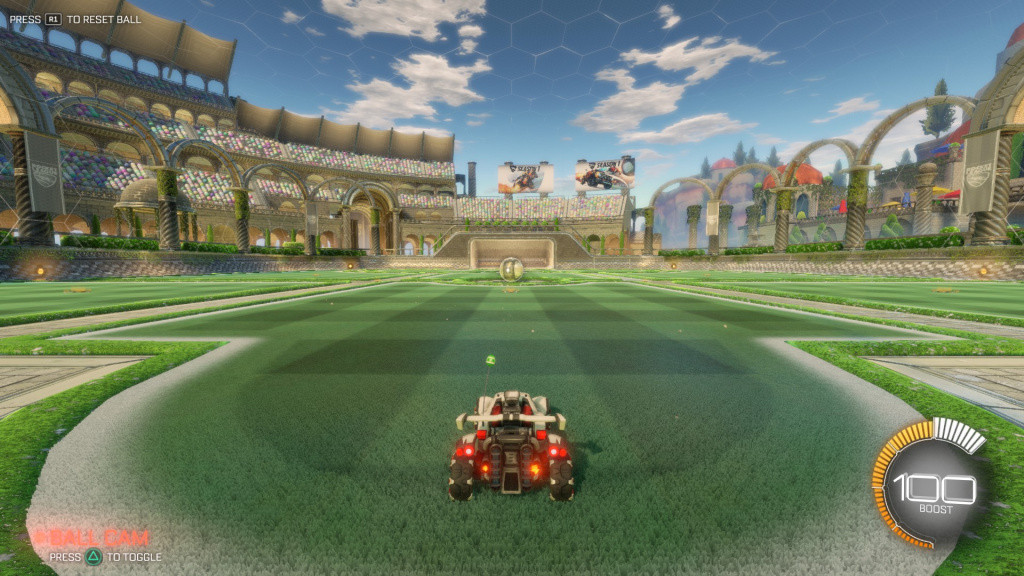
What qualifies as the best FOV and camera settings in Rocket League is not exactly hotly contest but there are preferences, so to help you get the best setup for you we have put together this guide wherein we will break down what each of the settings mean, what are best options, and a look at how that is represented in-game.
- Read more: Rocket League: Best shooting training packs
If you are unsure about what any of the settings mean there is a glossary at the bottom of the page.
Best FOV and camera settings for Rocket League
Getting the right camera settings is one of the quickest ways you can boost up the ranks at Rocket League. It is not going to make you a pro, at least not straight away, but you will see an immediate improvement in your performance.
What the best settings for you actually are a matter of personal preference. The best thing you can do is try different ones out and when you find one you like, slowly adjust it to make it perfect.
- Read more: Rocket League: Best defending training packs
We have provided three settings that aid certain playstyles found in Rocket League to give you an idea of where to start.
Oh and remember, whatever you do make sure "Camera shake" is turned OFF.
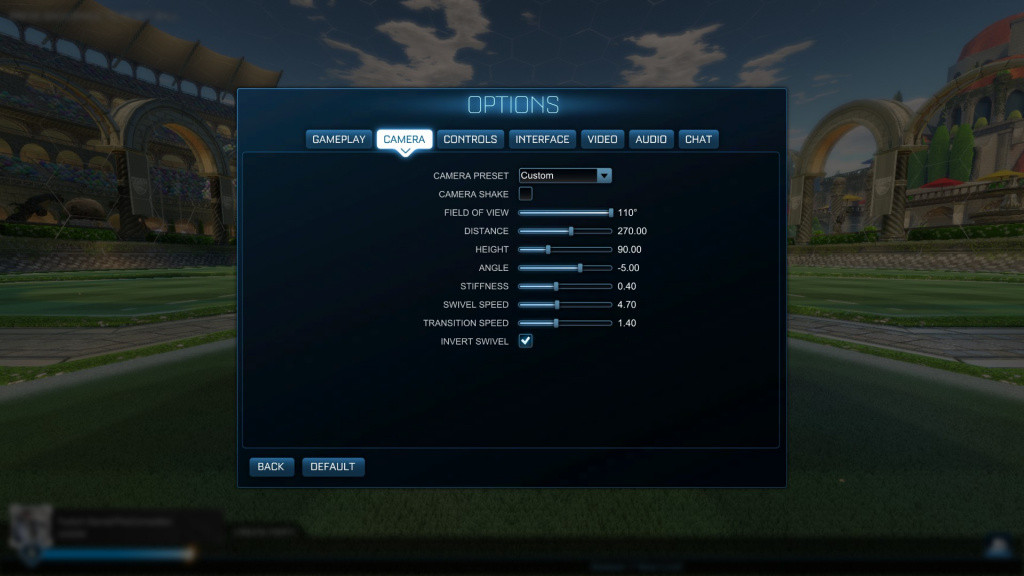
The Dribbler
(Picture: Psyonix)
Used by the likes of Maello “Aztral” Ernst these camera settings are designed to give you maximum control over your car.
(Picture: Psyonix)
The Defender
(Picture: Psyonix)
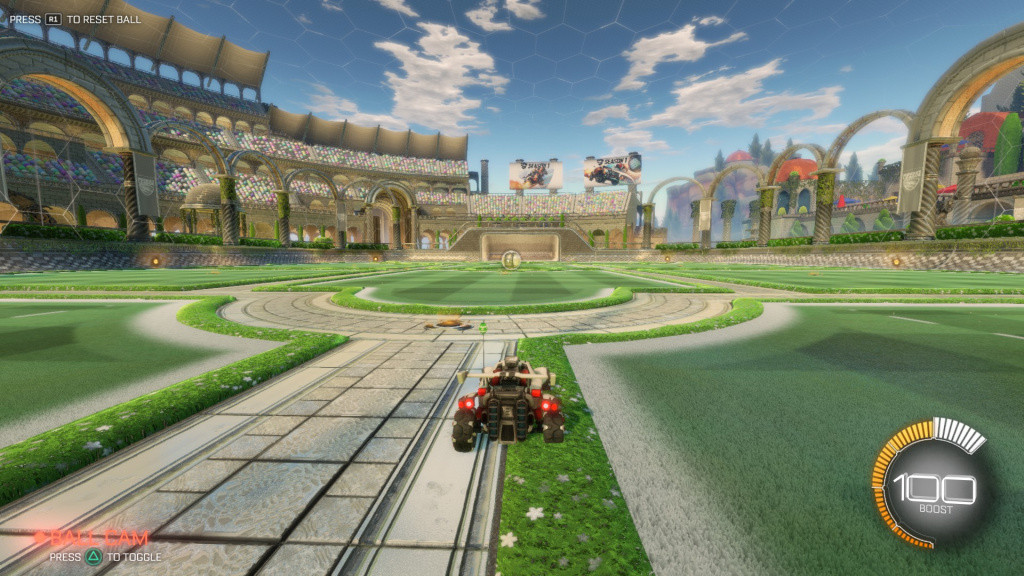
With more distance and a lower angle, these camera settings give you a more complete view of the pitch used by four-time world champion Pierre "Turbopolsa" Silfver.
(Picture: Psyonix)
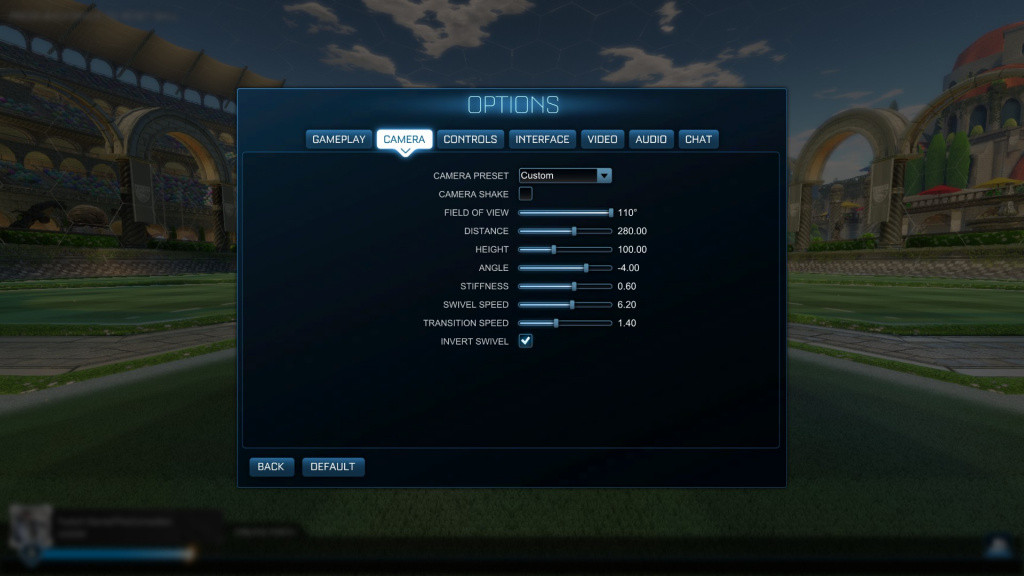
The All-Rounder
(Picture: Psyonix)
An attempt to give you the best for both worlds and a slight derivative of that used by Garret "GarretG" Gordon this gives you decent view of your car for that close control while also giving you a good view of the field.
Glossary
Camera shake - An artificial shake each time your car hits the ball or a surface. By default it is turn ON but make sure you have this OFF.
Field of view - The FOV is how zoomed in, our zoomed out the camera is to your car. The higher the value = the wider the shot and the more you will see at your sides.
Distance - This sets how far away the camera is positioned.
Height - This value determines how high or low the camera is positioned. Lower will give you greater visibility, higher is better for car control.
Angle - Determines how far pointed down your camera is. The more negative it is the further it will be pointed down.
Stiffness - This value determines how stick the camera is to your car, the lower the number the slower the camera will be to catch up with the back of your car.
Swivel speed - Determines how fast your camera moves when used manually.
Transition speed - The speed at which your camera switches from car cam to ball cam. The higher the value the quicker it is, with 2 (the maximum) being essentially a jump cut.
Ball cam - One of two camera views, ball cam refers to when the camera will stay fixated on the ball unless manually moved.
Free cam - The camera will always face your car unless manually moved.

 No ads, our video library,
