Battlefield 6’s Multiplayer Looks, and Feels, Like a Strong Return to Form.
Not Just Expansion: How Side Plans to Help Shape Saudi Arabia’s Games Industry From the Ground Up
More Than a Tournament: How The Milk Cup 2025 is Empowering Women On and Off the Stage
FNATIC’s Boaster Talks Unexpected Support at EWC 2025, and the Value of “Official Repetition”
Death Stranding 2: On the Beach Review: Saving the World, One Pristine Package at a Time
Berserk or Die: A Button Mashing, Enemy Bashing Brawler
News
Best Homefield Advantage in EA Sports College Football 25 Revealed
We’re now less than a month out from the return of a long missed franchise, and EA Sports College Football 25 rankings week has kicked…
Texas A&M just won the EA Sports College Football 25 Super Bowl
It’s officially EA Sports College Football 25 rankings week, and the first reveal will have exactly one set of fans over the moon and the…
Genshin Impact 3.0 Leaks Reveal Tablet Analytics Event Details
Genshin Impact developer HoYoverse is gearing up for what could be one of the game’s most significant content updates since the 2.0 update. This is…
Genshin Impact 2.4 patch notes: New characters, Enkanomiya, Lantern Rite event, featured quests, and more
The next major update for Genshin Impact “Fleeting Colors in Flight” has arrived, and with it, players now have the chance to experience a new…
Fortnite Vanguard Squadron X-Wing Glider: How to get
While the main crossover theme for Fortnite Chapter 2 Season 4 is without a doubt focusing on Marvel heroes and villains, there’s another crossover going…
Fortnite Shield Keg item: How to get, price, and effects
There has been so much to explore so far in Chapter 3 of Fortnite as the battle royale has moved to a new segment of…
Chopper’s Champion Cup: Schedule, format, prize pool and how to watch
While the Contender Cash Cups and the Platform Cash Cups give everyone a chance to participating in some Fortnite esports action, the Champion Cups are…
FIFA 22 servers down? FUT server status, maintenance & EA updates
Have the FIFA 22 servers gone down, again? If so, you’ve come to the right place, welcome to the official GINX FIFA 22 server status…
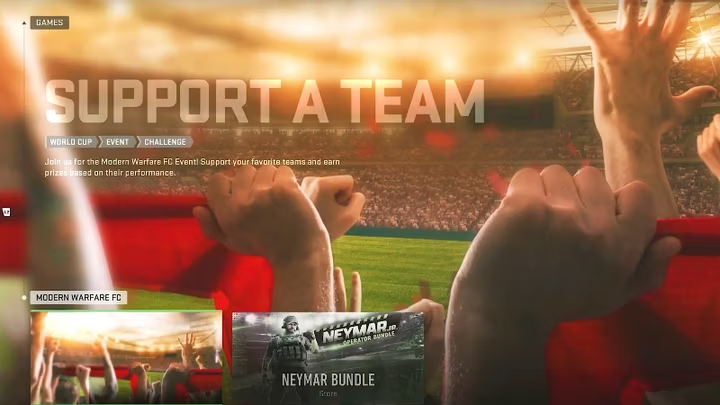
How To Play “Support A Team” In Modern Warfare 2 & Warzone 2
Call of Duty: Modern Warfare 2 and Warzone 2 partnered with FIFA to celebrate the ongoing World Cup, meaning COD players can enjoy tons of…
Popular mode “Gun Game” spotted in Vanguard Combat Records
Call of Duty: Vanguard players might be in for a treat after a notable source revealed that players had spotted the popular game mode “Gun…
Reviews
Guides and Tutorials
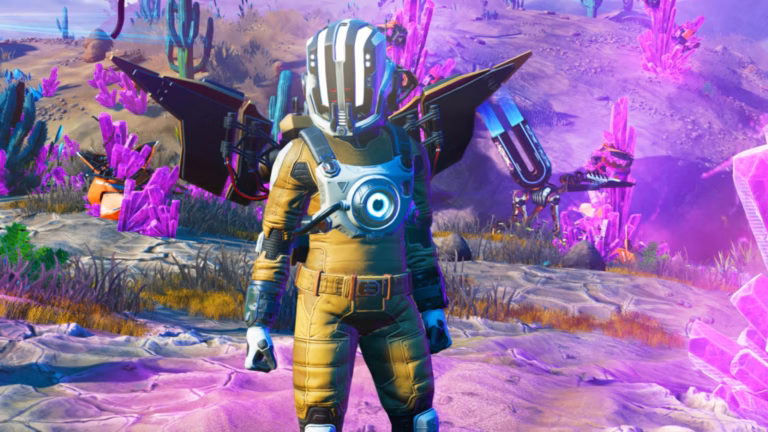
When Is The Next No Man’s Sky Expedition?
On the lookout for when is the next Expedition in No Man’s Sky? You’re in the right place. The popular survival game has hosted several…
How to Do a Double Pass in College Football 25
With the arrival of College Football 25, some of the most stunning trick plays from its real-life counterpart can be a blast to nail in…
How to Do the Reverse Flea Flicker in College Football 25
The arrival of College Football 25 means that some of the sport’s most stunning and dynamic trick plays are ready to make things even more…
EA Sports College Football 25 Cover Athletes, List of Every Cover Athlete
Table of Contents EA Sports College Football 25 Cover Athlete Revealed List of Every NCAA Football Cover Athlete After a decade of absence, EA Sports…
EA Sports College Football 25 Teams List, All 134 Schools Confirmed
Table of Contents EA Sports College Football 25 Teams List Will more schools, colleges, and universities be added? EA Sports College Football 25 Team Ratings…
Palia The Acceptance Ceremony Quest And Walkthrough
Table of Contents Palia The Acceptance Ceremony Quest Objectives List How To Complete The Acceptance Ceremony Quest In Palia? After multiple quests of integrating themselves…
Every Monster Added In Monster Hunter Rise Sunbreak Title Update 1
Nearly two months after the release of Monster Hunter Rise: Sunbreak, Capcom has finally released the first batch of additional content called Title Update 1….
Honkai Star Rail System Requirements Guide – Can Your Phone Play It?
Honkai Star Rail is a massive open-world turn-based RPG. The game features tons of playable and non-playable characters, beautifully animated cutscenes, and tons of quests…
How To Chat With Friends In Honkai Star Rail
Honkai Star Rail is an amazing game with tons of content for players to enjoy. Whether you like venturing through the Simulated Universe or playing…
Genshin Impact Dragon Beard Noodles recipe: How to get, effects and ingredients
The Genshin Impact 2.4 update, entitled “Fleeting Colors in Flight”, is now available, bringing a tonne new features, from the Enkanomiya region, new threatening enemies,…
Interview
Game Updates
WWE 2K24 PC Requirements, Expected System Specs
With launch day closing in fast, players are already trying to seek details about the WWE 2K24 PC requirements. Every player’s system is different and…
WoW Dragonflight Performance & Stuttering Issues Fix
As World of Warcraft (WoW)’s latest expansion, Dragonflight is taking the ever-popular MMORPG to the next level and players to Dragon Isles. While the expansion…
GTA Online Weekly Update (5 June 2025)
Table of Contents GTA Online Weekly Update Reset Times (June 2025) New/Returning Content GTA$ and RP Bonuses This Week Weekly Challenge Week’s FIB Priority File…
GTA Online Prize Ride This Week (5 June 2025)
Table of Contents What Is This Week’s GTA Online Prize Ride? When Will The GTA Online Prize Ride Reset? Rockstar Games drops their latest GTA…
GTA Online Podium Car This Week (5 June 2025)
Table of Contents What Is The GTA Online Podium Car This Week When Will The GTA Online Podium Car Reset? How To Win Podium Car…
Marvel Rivals Season 2.5 – Release Date and Content Overview
While mid-season updates in most online multiplayer games are usually minor, Marvel Rivals treats them more like full-fledged seasons, packed with substantial new content, and…
Roblox Fisch Patch Notes (24 May 2025)
Looking for the latest Fisch patch notes on Roblox? You’re in the right place! From fresh bestiaries, islands, and fishing rods to unique bobbers and…
When Is The Next Fisch Update? Release Date & Time
When does the next Fisch update drop? Great question! Each new patch brings a ton of new content, like rods, bestiaries, and events to keep…
The Bison Charges into ARK: Survival Ascended with Ragnarok
The next few months are looking exciting for ARK: Survival Ascended, as the fan-favorite map Ragnarok is set to return. With it comes a wave…
Marvel Rivals Patch Notes (May 2025): All New Content, Adjustments & Bug Fixes
Table of Contents Latest Marvel Rivals Update, Hotfix & Patch Notes News: Marvel Rivals v.20250508 Patch Notes: All New Content, Adjustments & Bug Fixes Marvel…
Roblox
Exploring the Creative Potential of Roblox Grow a Garden
What Makes Grow a Garden Stand Out At its core, Grow a Garden is a resource collection game, but what sets it apart is its…
Sols RNG Fishing Update Patch Notes: New Auras, Fishing Feature & More
The Sol’s RNG Fishing update finally dropped (only a day later than expected)—but hey, at least it’s live now! While it’s not the biggest update…
Grow A Garden Tranquil Bloom: How To Get & Value
Tranquility just got profitable. The Tranquil Bloom is one of the most valuable seeds ever added to Grow A Garden. It’s prismatic, rare, and packs…
Grow A Garden Raiju: How To Get & Passive Ability
Trying to unlock Raiju in Grow A Garden? No shocker! This stormy new pet is inspired by the legendary Japanese thunder beast and companion of…
Grow A Garden Codes (26 July 2025)
In Roblox Grow a Garden, players can purchase seeds for different crops and plants in order to grow them. They can then harvest and sell…
Marvel Rivals
Marvel Rivals Season 2.5 – Release Date and Content Overview
While mid-season updates in most online multiplayer games are usually minor, Marvel Rivals treats them more like full-fledged seasons, packed with substantial new content, and…
Ultron Joins Marvel Rivals in Season 2.5, But Fans Are Wary of His Kit
With Marvel Rivals‘ mid-season update on the horizon, one of the most exciting additions in Season 2.5 is Ultron, the newest Strategist Rival. Now that…
Community Divided as Jeff Gets Major Changes in Marvel Rivals Season 2.5
Marvel Rivals is halfway through Season 2, and the highly anticipated mid-season update, Season 2.5, is just around the corner. However, what’s sparking conversation among…
Marvel Rivals Announces the Return of the Season 0 Battle Pass — But There’s a Catch
In celebration of Marvel Rivals reaching its one-year milestone since the Closed Alpha, the developers at NetEase are bringing back the Season 0 Battle Pass….
Marvel Rivals Patch Notes (May 2025): All New Content, Adjustments & Bug Fixes
Table of Contents Latest Marvel Rivals Update, Hotfix & Patch Notes News: Marvel Rivals v.20250508 Patch Notes: All New Content, Adjustments & Bug Fixes Marvel…
Counter-Strike 2
Canadian CS2 Spotlight: Top Teams, Players and Tournaments Driving the Scene
With Canadian CS2 action heating up—on both LAN floors and live streams—it’s no coincidence that the best sportsbooks in Canada are covering major tournaments alongside…
ESL FACEIT to Launch IEM Kraków
ESL FACEIT Group have announced that Counter-Strike will be heading to Kraków with the roll-out of a brand new event. Intel Extreme Masters Kraków is…
Your Guide To IEM Dallas 2025
IEM Dallas 2025 kicks off today, 19 May. For those Counter-Strike 2 (CS2) esports fans who haven’t marked their calendars yet, do so now! It’s…
StarLadder To Host 2025 CS2 Major In Budapest
StarLadder is bringing the second CS2 Major of 2025 to Budapest and is scheduled to run from November 24 to December 14, with the grand…
StarLadder Reveals Budapest Major 2025
It’s with great excitement that I get to report on the announcement of the next Counter-Strike 2 (CS2) Major Championship, which follows the BLAST.tv Austin…
Call of Duty: Black Ops 6
Call of Duty Black Ops 6 Zombies – Grief Mode Explained
With the launch of Call of Duty: Black Ops 6 and Warzone Season 4, players have plenty of exciting new content to dive into, and…
Call of Duty: Black Ops 6 and Warzone Season 4 Battle Pass Breakdown – Prices, Skins, and More
With Season 4 of Call of Duty: Black Ops 6 and Warzone now in full swing, players have a lot of exciting new content to…
Seth Rogen Teased for Call of Duty: Black Ops 6 and Warzone Appearance
Crossovers have become an undeniable staple in Call of Duty—both in Warzone and Black Ops 6—as seen with the arrival of the Teenage Mutant Ninja…
COD Black Ops 6 Codes (April 2025): Free Double XP, Blueprints, More
Black Ops 6, is the latest Call of Duty offering a brand new campaign, battle pass, rewards, and more. The game features ton of cosmetics,…
Call of Duty: Black Ops 6 Zombies – How to Upgrade The Ray Gun Mark 2
The Ray Gun Mark 2 is one of the most powerful weapons currently available in Call of Duty: Black Ops 6 Zombies – Shattered Veil….
Marvel Snap
Best Xorn Decks In Marvel Snap
Table of Contents Marvel Snap Xorn Card Abilities Explained: Best Marvel Snap Xorn Decks: Machine Control X Best Marvel Snap Xorn Decks: Scream And Leap…
Best Elixir Decks In Marvel Snap
Table of Contents Marvel Snap Elixir Card Abilities Explained: Best Marvel Snap Elixir Decks: Milling Some Elixir Best Marvel Snap Elixir Decks: Budget-Friendly Elixir Best…
Best Prodigy Decks In Marvel Snap
Table of Contents Marvel Snap Prodigy Card Abilities Explained: Best Marvel Snap Prodigy Decks: A Prodigy Evolved Best Marvel Snap Prodigy Decks: Smooth Like A…
Best Surge Decks In Marvel Snap
Table of Contents Marvel Snap Surge Card Abilities Explained: Best Marvel Snap Surge Decks: Surge n’ Buff Best Marvel Snap Surge Decks: Surging Tempo Power…
Best Esme Cuckoo Decks In Marvel Snap
Table of Contents Marvel Snap Esme Cuckoo Card Abilities Explained Best Marvel Snap Esme Cuckoo Decks: Cuckoo Lashing Out Best Marvel Snap Esme Cuckoo Decks:…
WWE 2K25
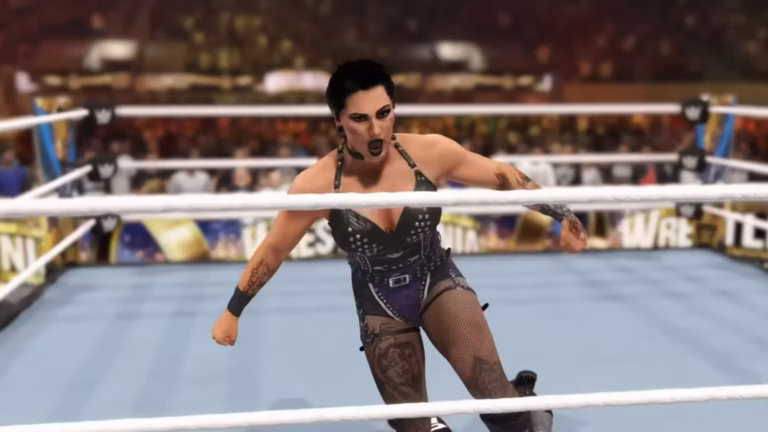
WWE 2K25 Review: Beware The Island of Microtransactions
WWE 2K25 continues to build on the foundation of recent years with upgrades in several different areas, but it’s not all good news. Despite quality…
WWE 2K25 Game Mode Risks Making NBA 2K’s Worst Mistakes
With the announcement of WWE 2K25, fans are already getting excited for all the new features coming this year. One game mode that’s become a…
WWE 2K25 Editions Explained, All Pre Order Rewards
After teasing some specific cover reveals on Twitter and during WWE Raw on Netflix, all the WWE 2K25 editions have officially been confirmed. This year,…
WWE Fans, Players React To WWE 2K25’s The Island Mode Not Being On PC, Last Gen Consoles
WWE and 2K unveiled the official cover athlete for the next entry in the WWE 2K gaming series, which, as many had guessed, will be…
WWE 2K25 Cover Star Revealed for Deluxe Edition, May Confirm Showcase
With more news about WWE 2K25 rapidly approaching, the first key reveal has dropped. The primary WWE 2K25 cover athlete isn’t official just yet and…
GTA Online
GTA Online Salvage Yard Robbery Vehicles This Week (5 June 2025)
Table of Contents What Is The GTA Online Salvage Yard Robbery Car This Week? All Salvage Yard Robbery Vehicles When Will The GTA Online Salvage…
GTA Online Weekly Update (5 June 2025)
Table of Contents GTA Online Weekly Update Reset Times (June 2025) New/Returning Content GTA$ and RP Bonuses This Week Weekly Challenge Week’s FIB Priority File…
GTA Online Prize Ride This Week (5 June 2025)
Table of Contents What Is This Week’s GTA Online Prize Ride? When Will The GTA Online Prize Ride Reset? Rockstar Games drops their latest GTA…
GTA Online Podium Car This Week (5 June 2025)
Table of Contents What Is The GTA Online Podium Car This Week When Will The GTA Online Podium Car Reset? How To Win Podium Car…
GTA 5 Ray Tracing: How To Enable
Need help to turn on ray tracing in GTA 5 Enhanced Edition? No problem. The PC version of Rockstar Games’ now decade old classic received…
Valorant
Valorant Swiftplay Mode Guide: How To Play, Duration
Riot Games has released the beta version of a brand new mode called Swiftplay in Valorant patch 5.12. The mode has been made available in…
How To Copy Crosshair In Valorant
Crosshair is one of the most essential parts of Valorant as it can make you better than good or worse than bad. Even though you…
100T Hiko looks to raise money for troubled Valorant LATAM champions
100 Thieves’ Spencer “Hiko” Martin wants to organize a fundraiser in order to help the ex- LDM Valorant roster to continue playing Valorant as a…
FNATIC’s Boaster Talks Unexpected Support at EWC 2025, and the Value of “Official Repetition”
VALORANT is a new entry into the Esports World Cup for 2025, bringing with it the game’s passionate fan base and its ever-impressive pro scene….
Red Bull Home Ground Returns for VALORANT in US Debut
Red Bull Gaming is amping up the VALORANT community once again thanks to the return of Red Bull Home Ground during the VALORANT OFF//SEASON. For…