

CS:GO has gained significant popularity recently, especially since it became free to play. However, with the influx of players, certain bugs and issues have come to light. One common occurrence is the frustrating "VAC was unable to verify your session" error.
This error is often associated with the Valve Anti-Cheat (VAC) system detecting potential cheats or hacks. However, it can also be triggered by innocent software conflicts or minor glitches. So to help any player facing this issue, in this guide, we will provide quick solutions to fix the "VAC unable to verify" error in CS:GO.
CS:GO - How to fix the “VAC unable to verify” error
CS:GO players may encounter the VAC error message for various reasons. The most common cause is when Valve releases an update for the game. Other reasons usually involve players attempting to gain an unfair advantage through illegal means. However, if you are not cheating or using unfair methods, there is no need to worry.
Now let's explore some possible solutions to fix the VAC error in CS:GO:
Solution 1 - Fixing Via Steam in 3 easy steps:

Step 1: Log in to Steam and navigate to your game library. Right-click on Counter-Strike: Global Offensive and select "Properties" from the dropdown menu. This will open a window.
Step 2: Click on the "Local Files" tab. On the right side, you will find the option "Verify Integrity of Game Files...". Click on it to initiate the verification process, which will check for any missing or corrupted files and re-download them.
Step 3: After the verification process is complete, restart Steam and launch Counter-Strike: Global Offensive from your Steam library.
Solution 2 - Updating the Drivers:
Sometimes, the inability to verify the game files can be due to faulty drivers. It is always a good idea to keep your computer's drivers up to date. This solution may take a few minutes, but it can help resolve the issue.
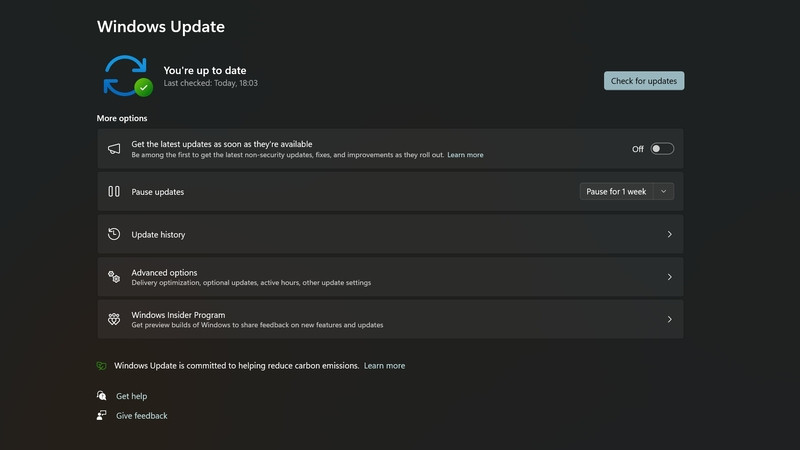
- Click Start
- Go to Settings - Update and Security
- Click on Windows Update in the left Sidebar
- Go to Check for Updates
- Download and Install any updates that are remaining
- You can also install Optional Updates to get your system up to date.
Solution 3 - Reinstalling CS:GO:
We understand that reinstalling a program or game is not always ideal, but it is often the simplest solution for various issues. Reinstalling Counter-Strike can help eliminate unwanted or corrupted files that may be causing the VAC error.
- Open Steam Library
- Go to CSGO and Right click
- Under Manage, click Uninstall
- Restart Computer
- Right-click on CS:GO in Steam and click Install
Note: Before starting the game again, make sure to restart Steam and log in. And of course, if none of these fixes work, you might need to contact Valve for a reprieve or to learn what the problem is with your account.
So there you have it, a quick and comprehensive look at the fixes you can implement to alleviate and avoid the dreaded VAC error in CS:GO. If a more direct or relevant fix appears in the future, we'll be sure to add it to this article, so be sure to check back here soon.
